If you know my daughter, you’ll know that from as little as she was able to start having preferences as a toddler, she’s loved getting dressed and glammed up! Well, during Spring Break earlier this year, we were in Atlanta, Georgia visiting my best friend from growing up. While we were there, we accompanied their family to get their teen daughter’s ears pierced at a cute little shop called “Sweet & Sassy”. When my 6-year-old walked in, it was as if she entered a complete dream world! Think of Claire’s except so much more; it’s a full-on spa for kids complete with a mani-pedi area, a hair salon, jewelry boutique, and a birthday party space with where kids can get glammed up and even walk down a runway that had balloons and mirrors.

Well, that evening (four months before her birthday), she looked at me with her sweet little face and asked if she could have a Sweet & Sassy birthday. Unfortunately, there isn’t a Sweet & Sassy here in California (ahem: white space opportunity here if anyone’s looking for a business idea!), so it kicked off a new project of making her special day something that would absolutely delight that beautiful little heart of hers.
As I love personalizing everything to make it unique to each child in whichever season they are in, I got her involved in the vision and particularly the activities she wanted at the party. She’s always loved doing her nails, so as a spa party, we knew that’d naturally have to be a part of it. As she’s currently into jewelry, we decided to make beading the craft portion of the event. She had been to another friend’s spa-themed party where she was introduced to face masking, which she thought was super fun and wanted to incorporate. From her dance recitals, she was excited about makeup but that was pushing a bit for this mama, so we settled on face painting as a fun compromise.
Now the creative process began, in terms of putting all the pieces together – her preferences, her areas of excitement, her current interests and favorites, and my own creative expression – into one cohesive theme and day. I won’t bore you with the thought process on how I arrived at each concept as it did take some time…let’s just get into how it all turned out!
It all began with the invitation. Since she wanted it to be called “Sweet & Sassy” (I added the “Seven”), I created my own design in Canva that I could upload to Paperless Post. Since “Sweet & Sassy” didn’t necessarily mean anything, I added images of spa and makeup elements so guests would have an idea what the party was about.

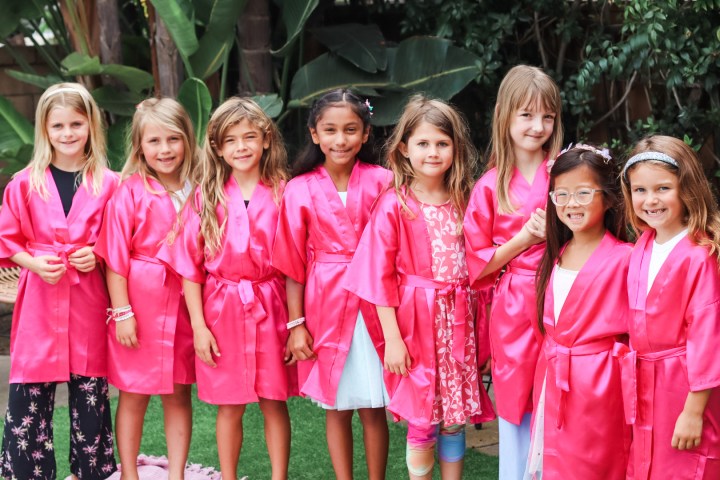
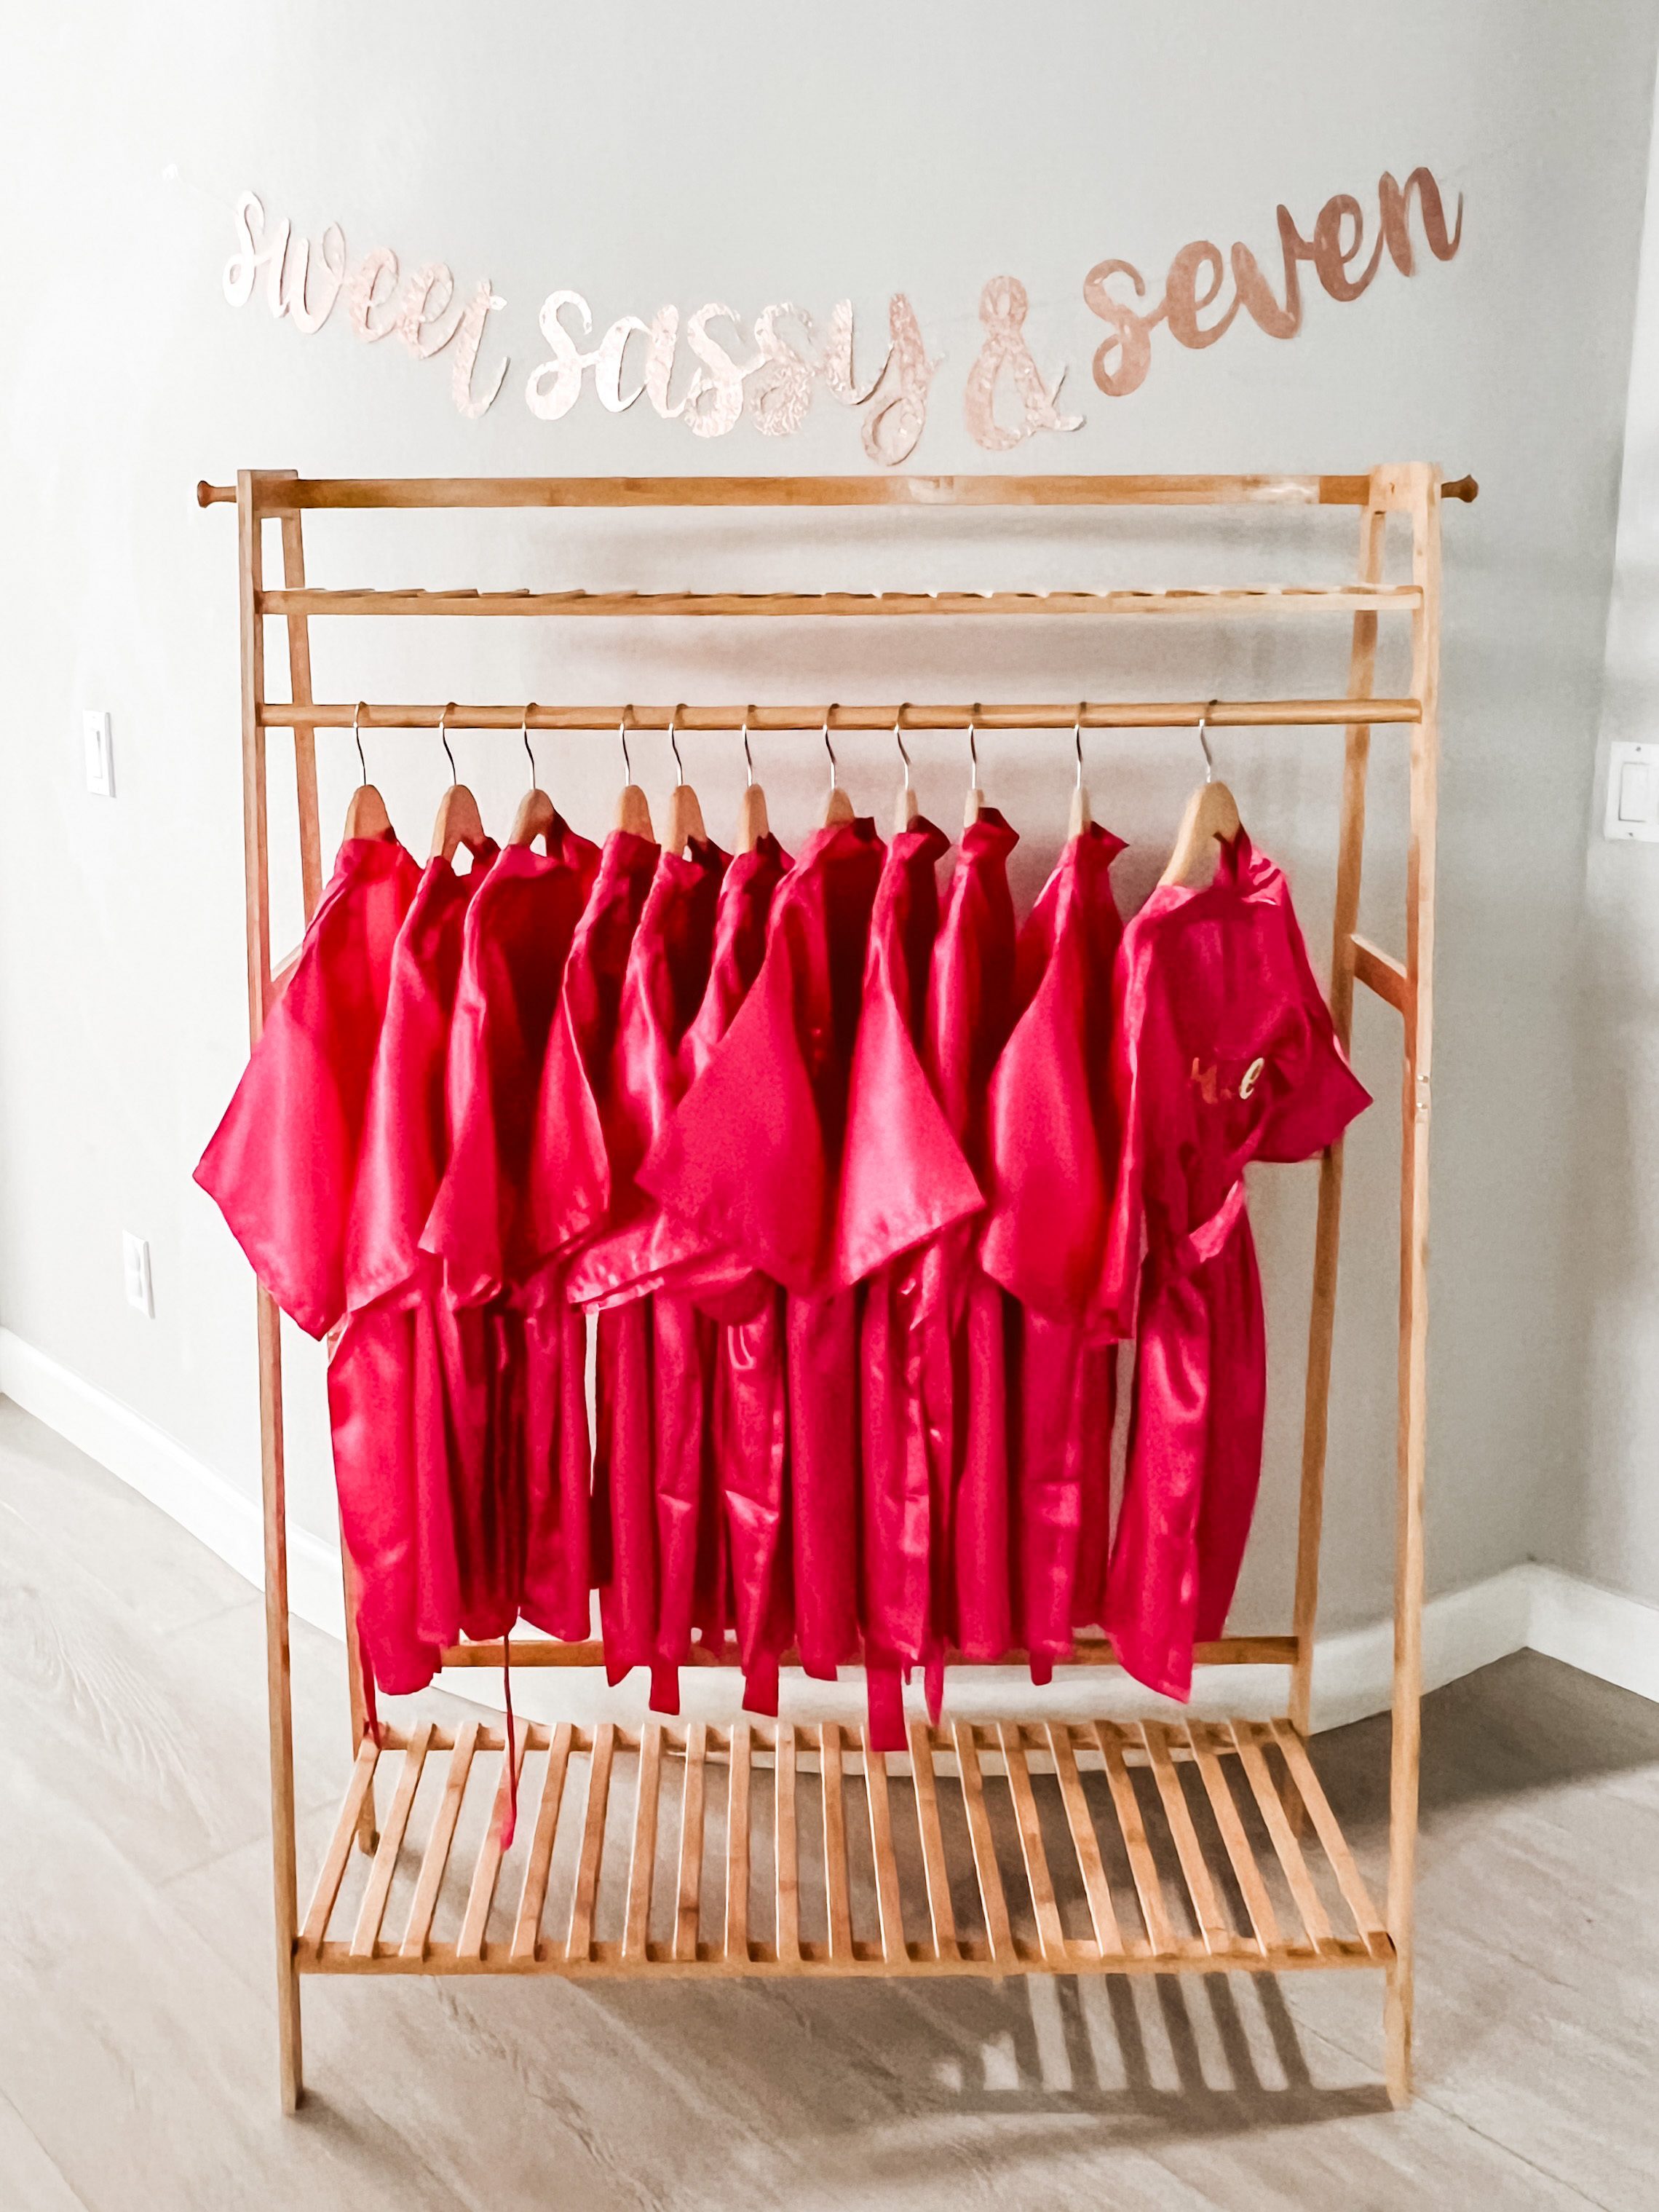
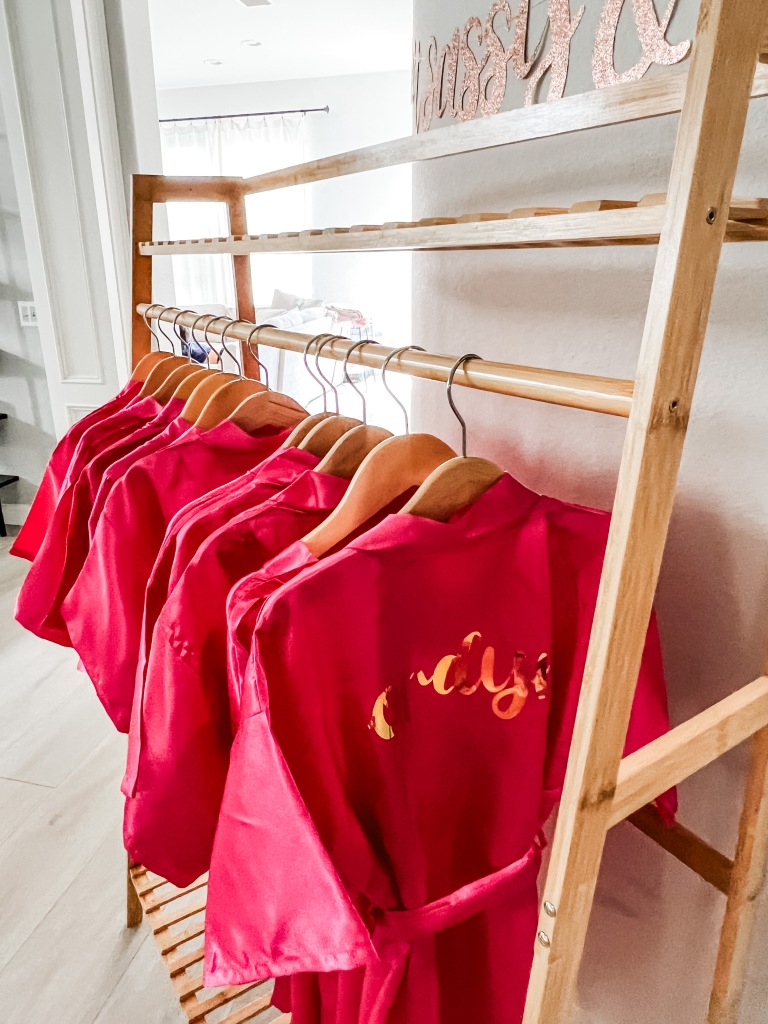
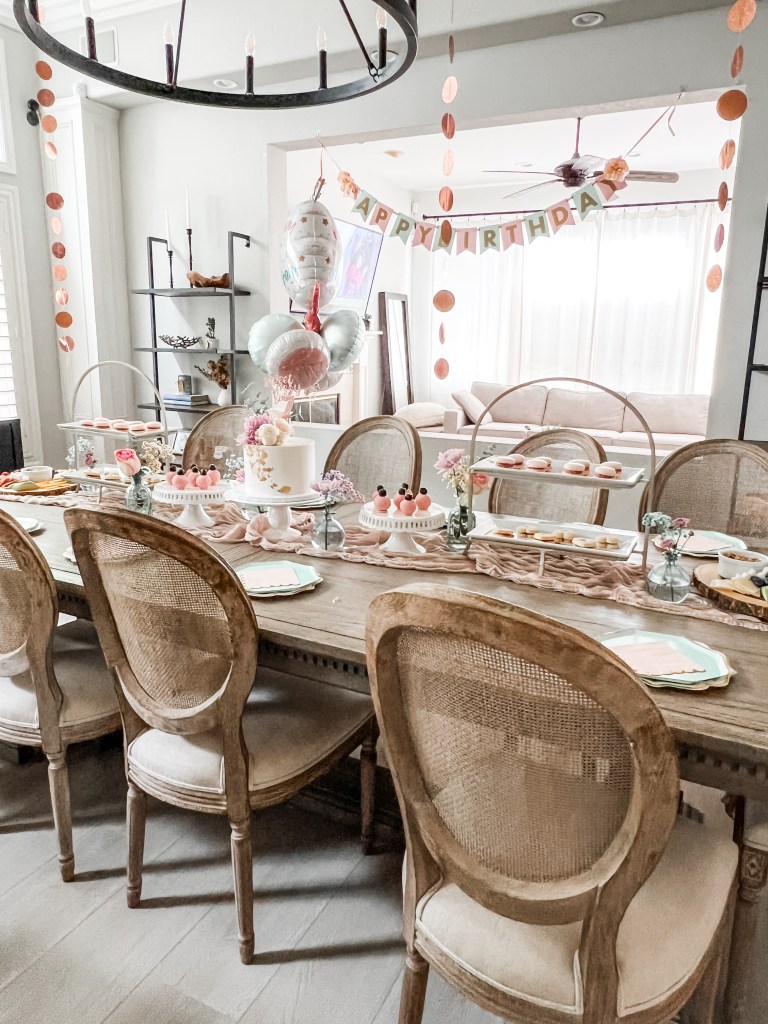
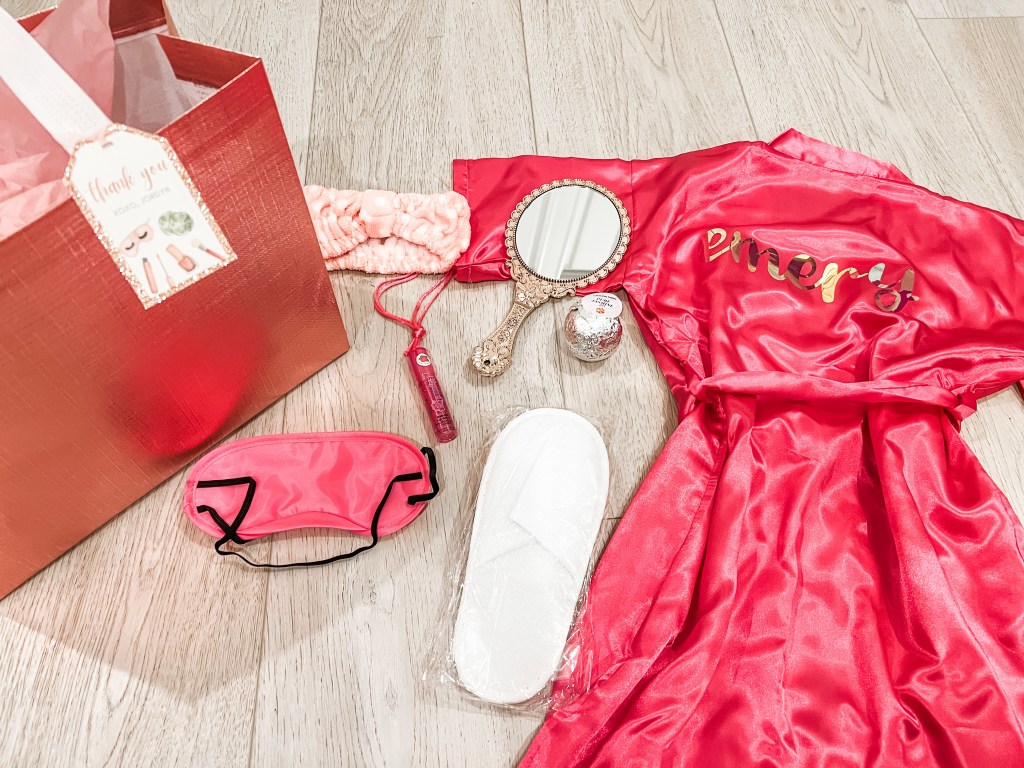
When it came to the actual party, the first moment when people walk in is when I love being able to reinforce and “introduce” the theme. Earlier this year, I also finally got a Cricut, which opened up so many more opportunities as I could now make so much signage and other fun cutout items myself more efficiently. I led off with a banner in rose gold glitter cardstock with the overarching theme. This was anchored by a rack of personalized satin robes for each guest (again, thanks to heat transfer Cricut paper and Amazon!)
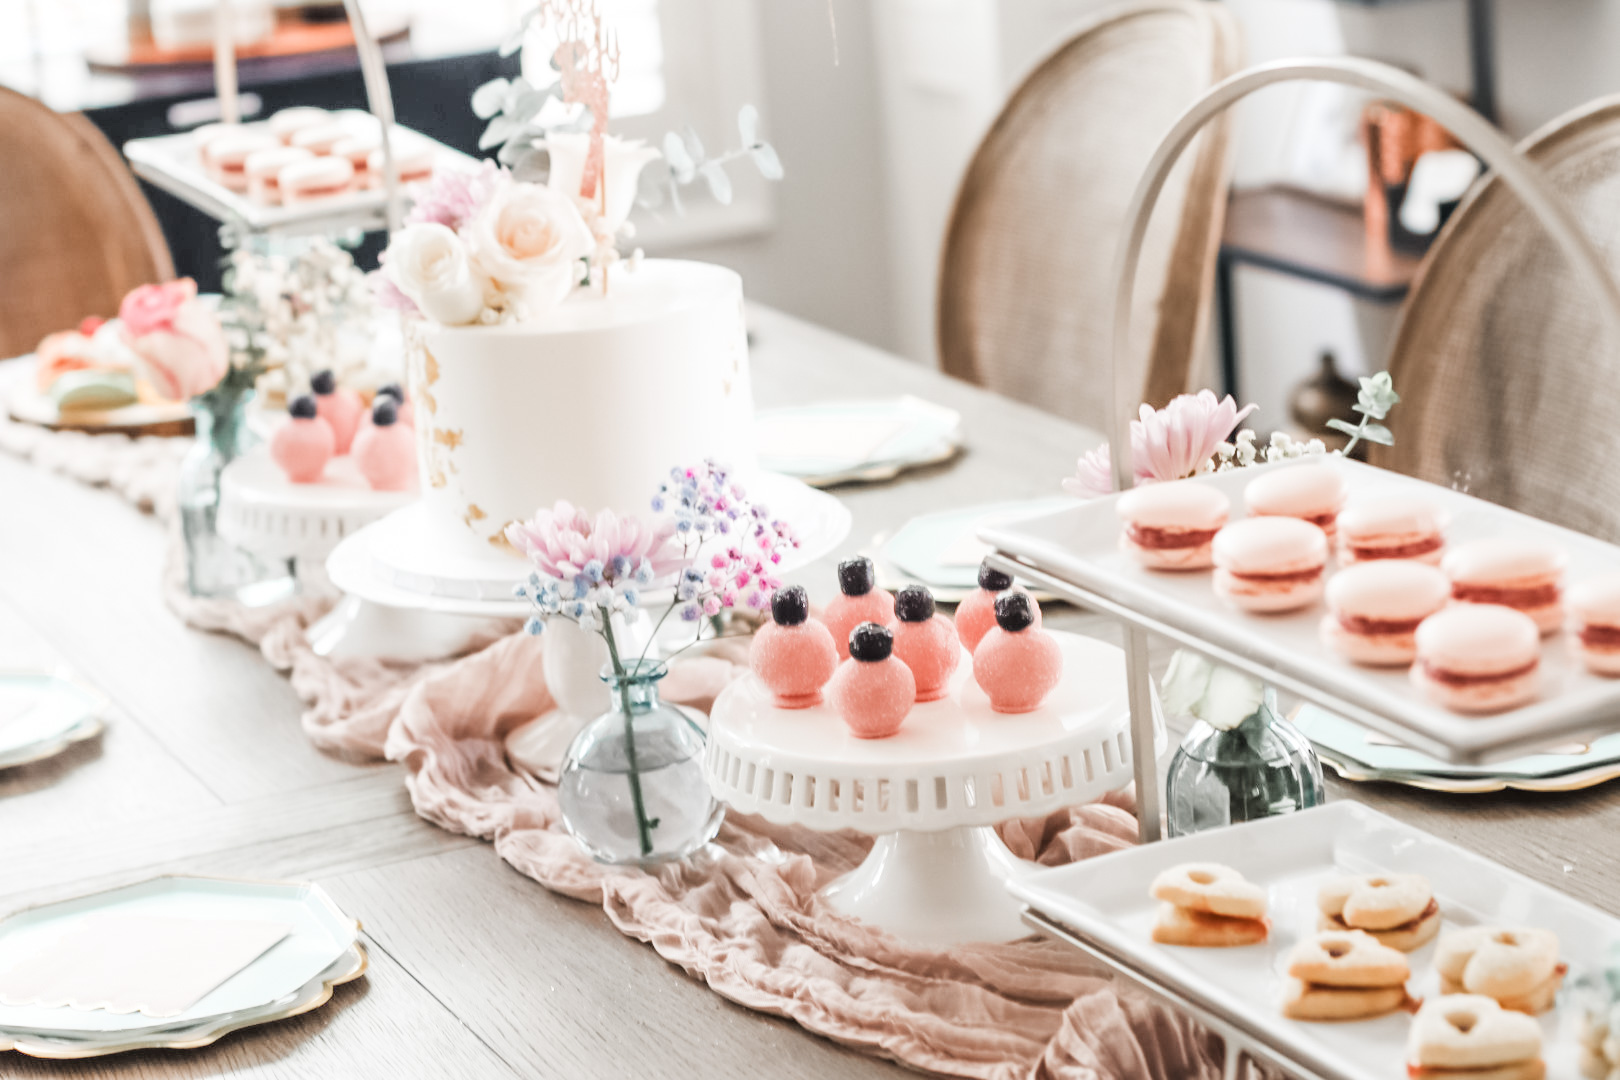
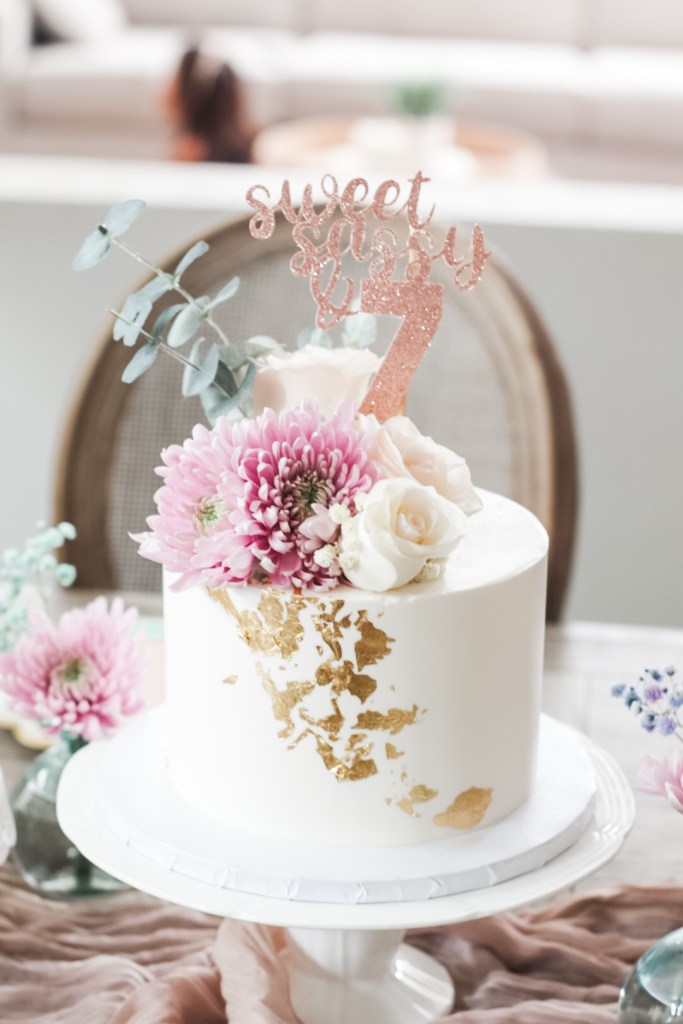
The dessert spread which we’d end the party on was also all set up at the start (since I definitely wouldn’t have time to do so once the kids arrived). Because we held the party in the afternoon, we kept it to light treats and cake. I also made two identical kid-style charcuterie platters, with cheese, fruit, salami, mini marshmallows, and mini chocolate chip cookies from Trader Joe’s (the little things that look like nuts in the ramekin!)


As each kid arrived, they were able to get their robe and get ready to “enter the party”, which was going to be held in the backyard. This is where all the activities were set up. As soon as they walked out, they were introduced to the table where the first main event would be, which was the facials. That would be the first activity and one the kids would do all together. The rest of the stations were behind that, and designed to allow the kids to freely rotate between the various activities.


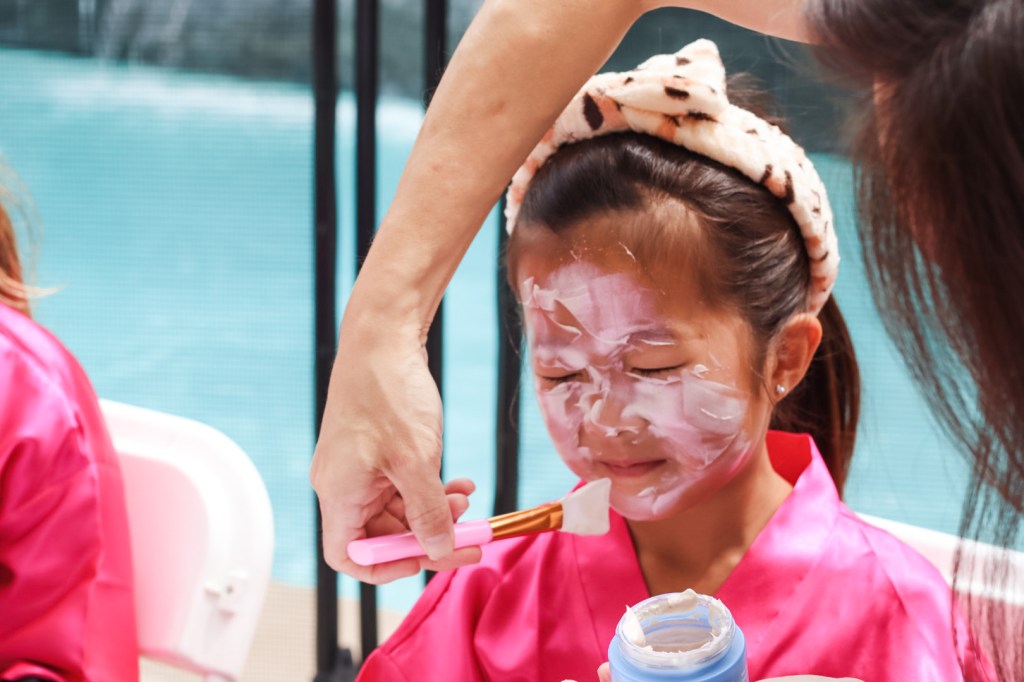
The “facial” station. Each kid would have a seat and a little tray that featured their DIY facial “kit”. I didn’t bring out the cucumbers until right before, in order to keep them cool in the fridge. Again, Amazon to the rescue! I bought all of these items off of Amazon: the tabletop vanity mirrors, silicone facial brushes, spa headbands, the white trays, and the soft pink facecloths.
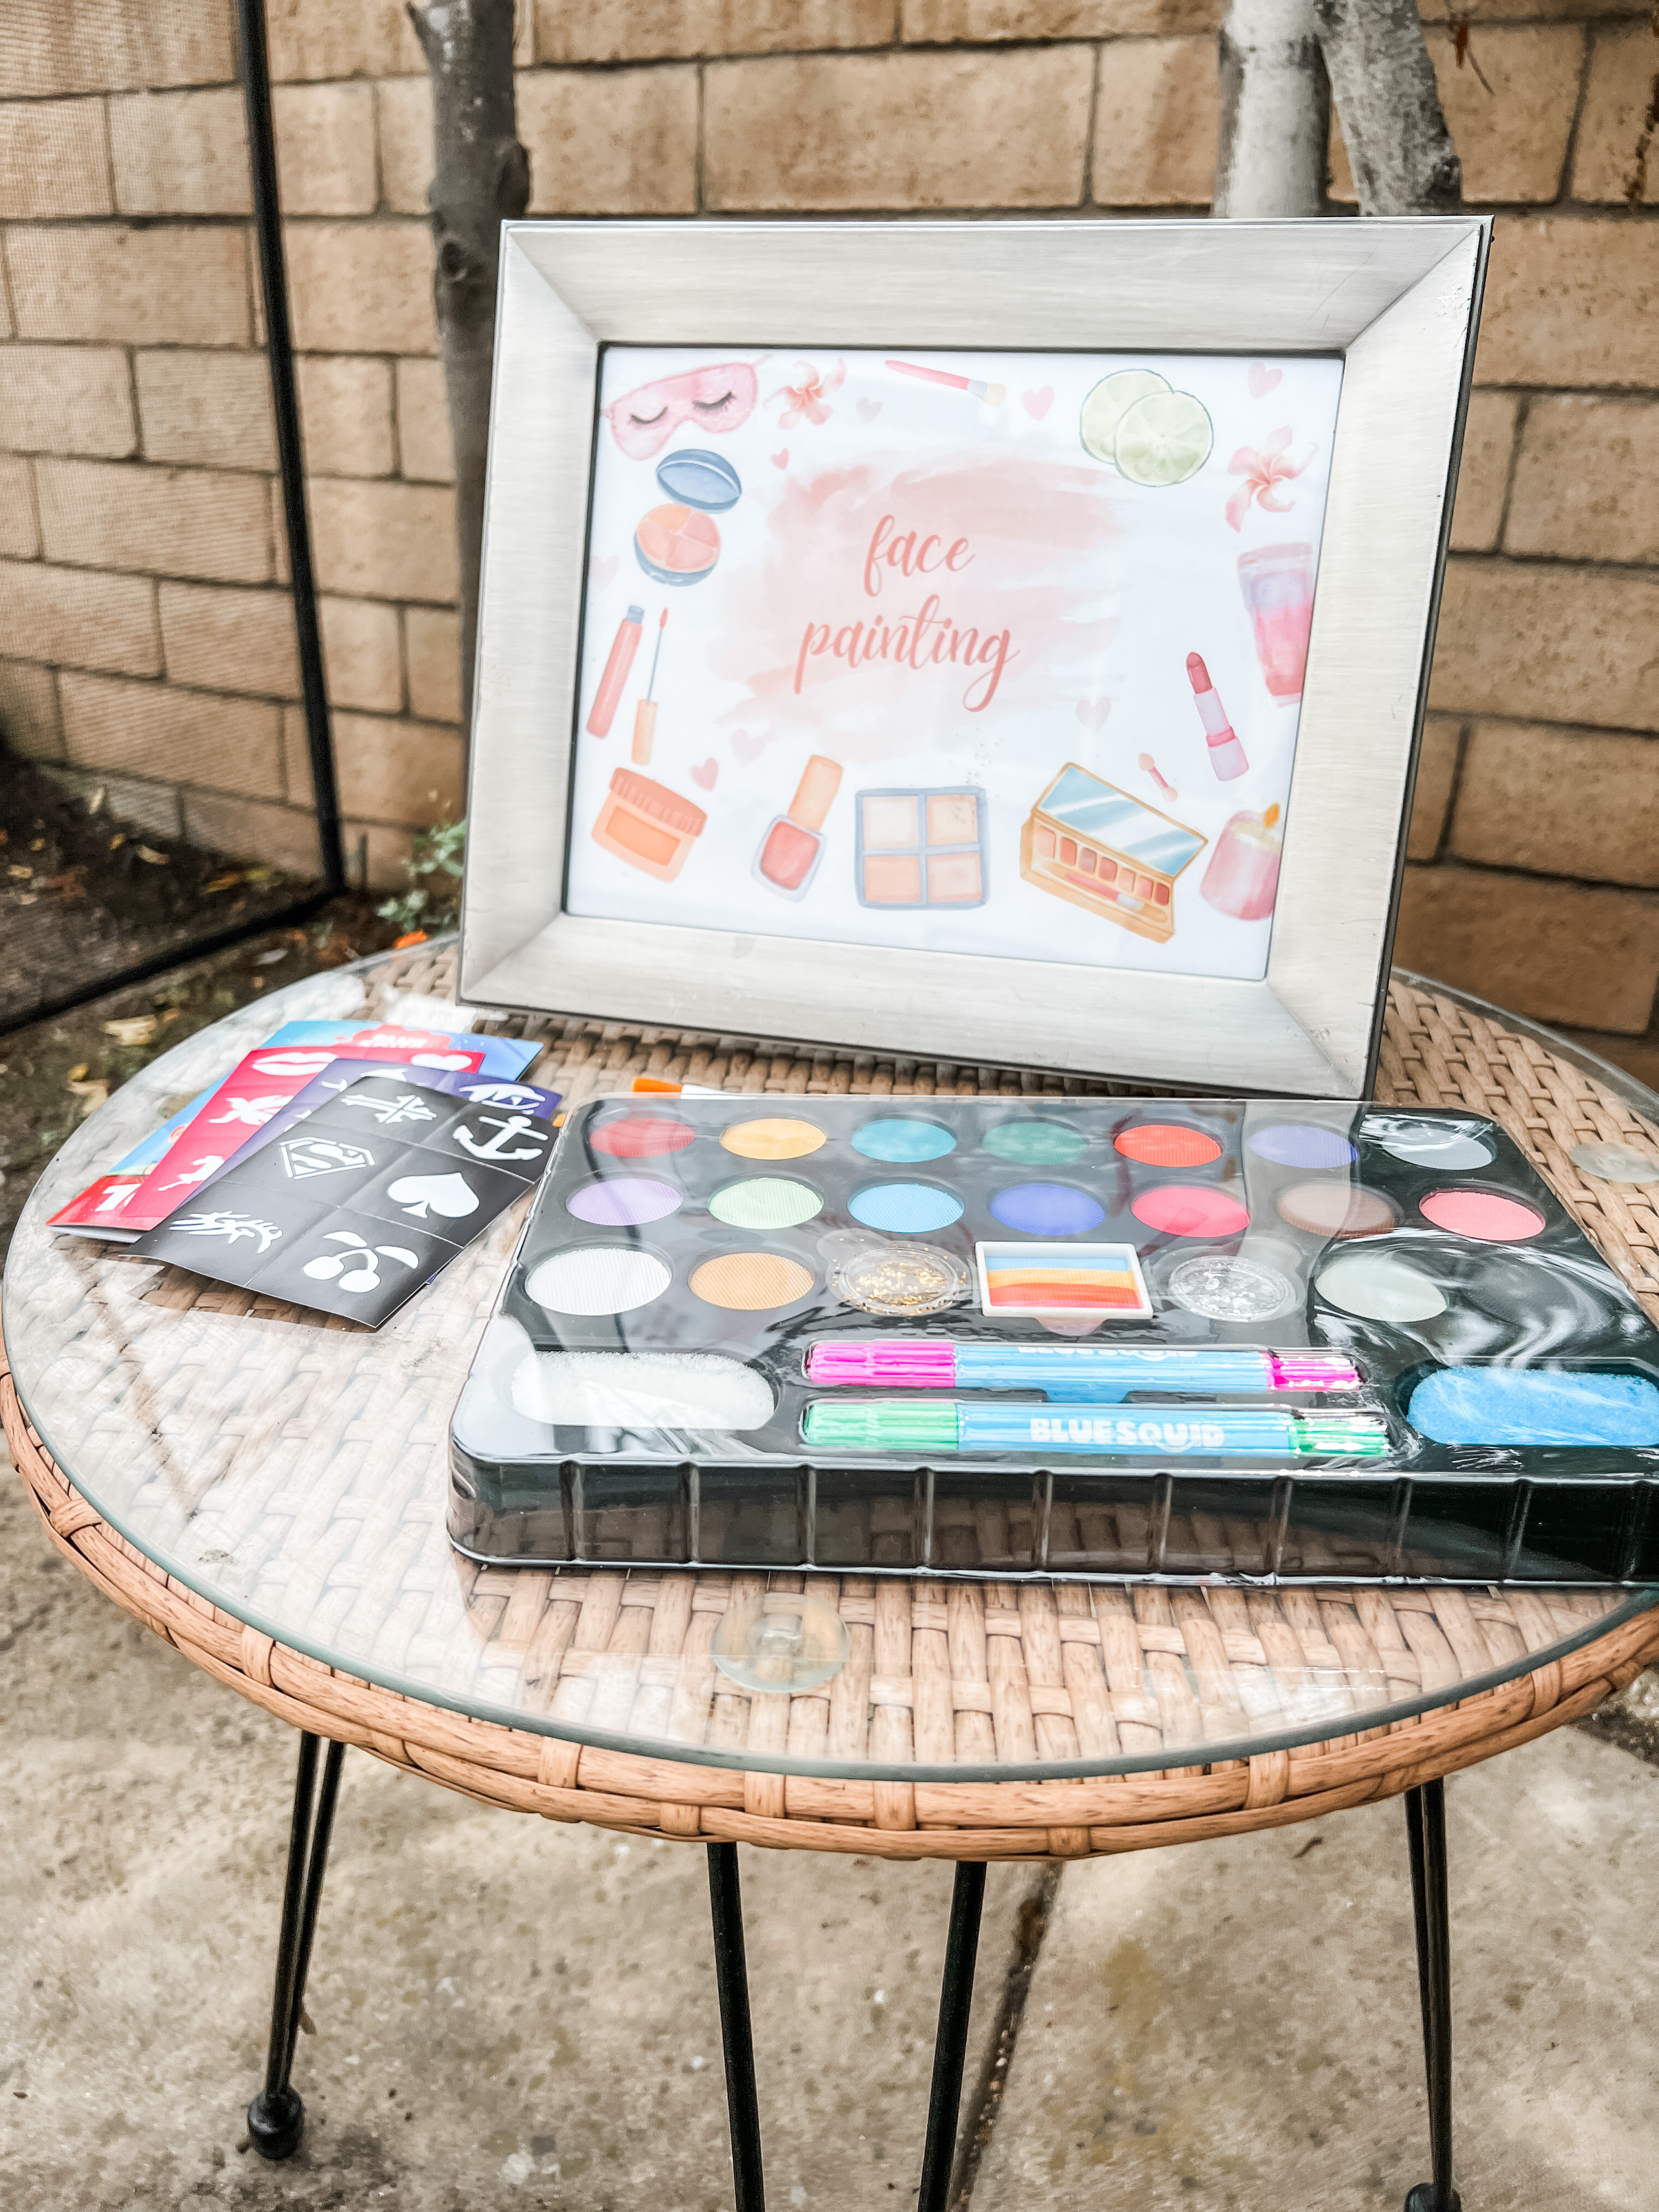
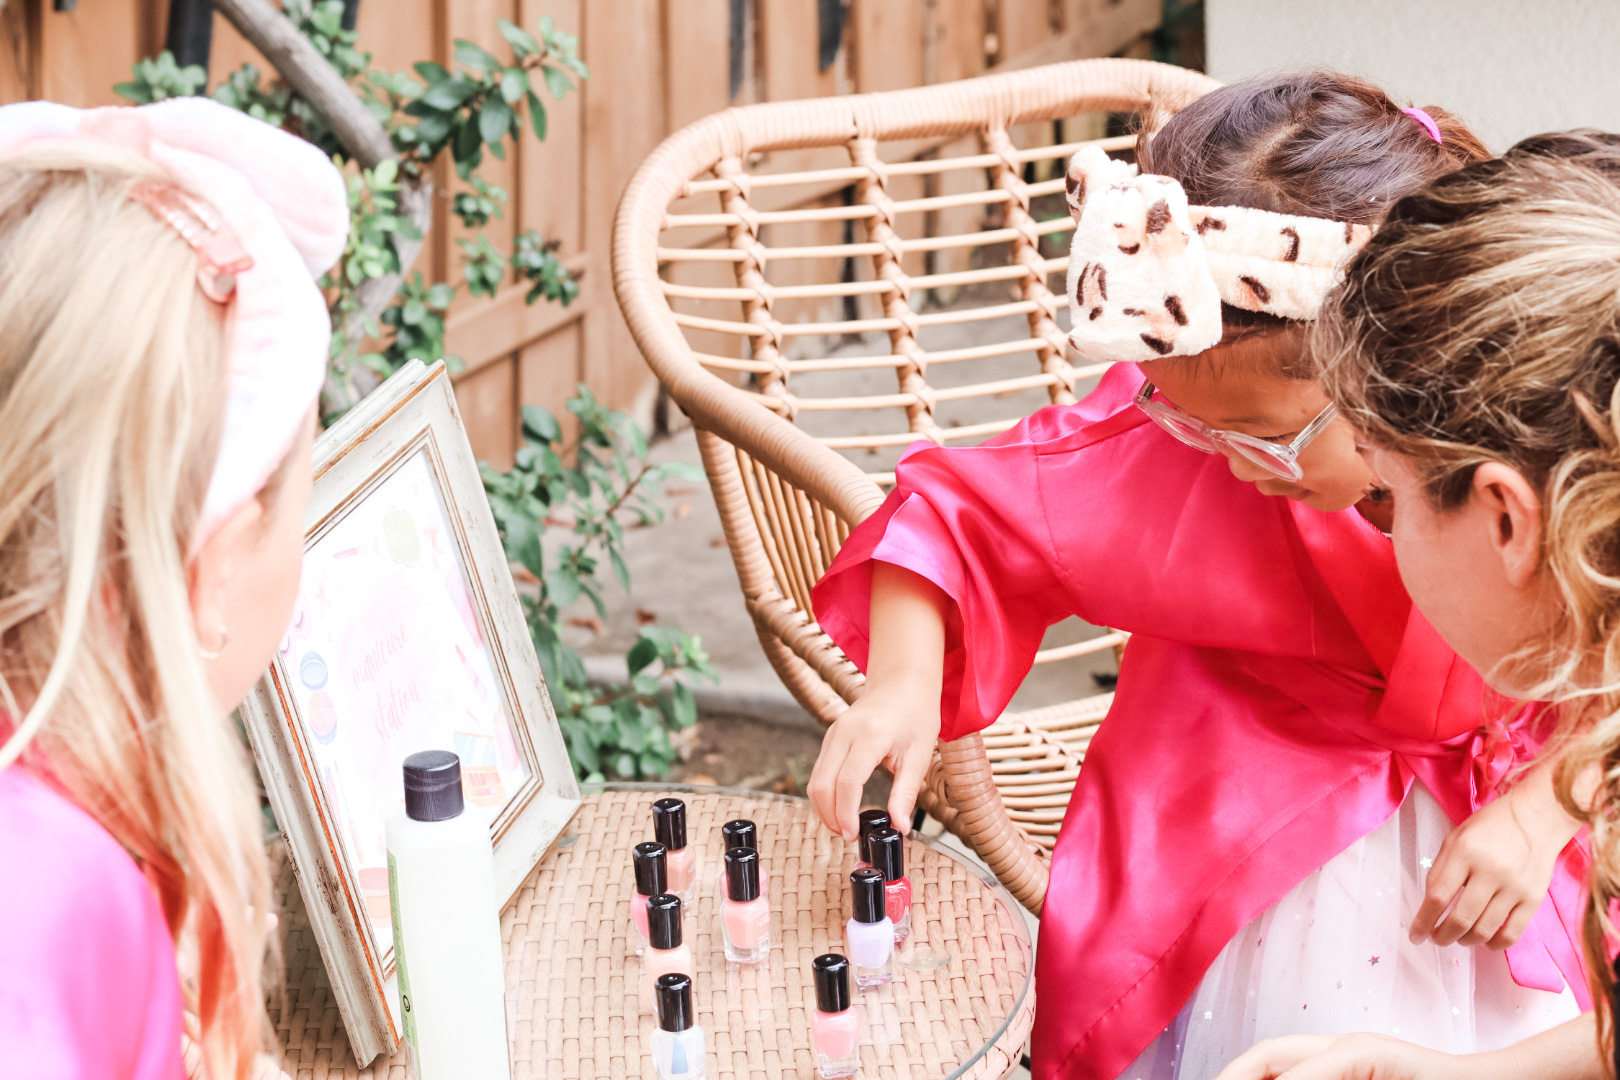
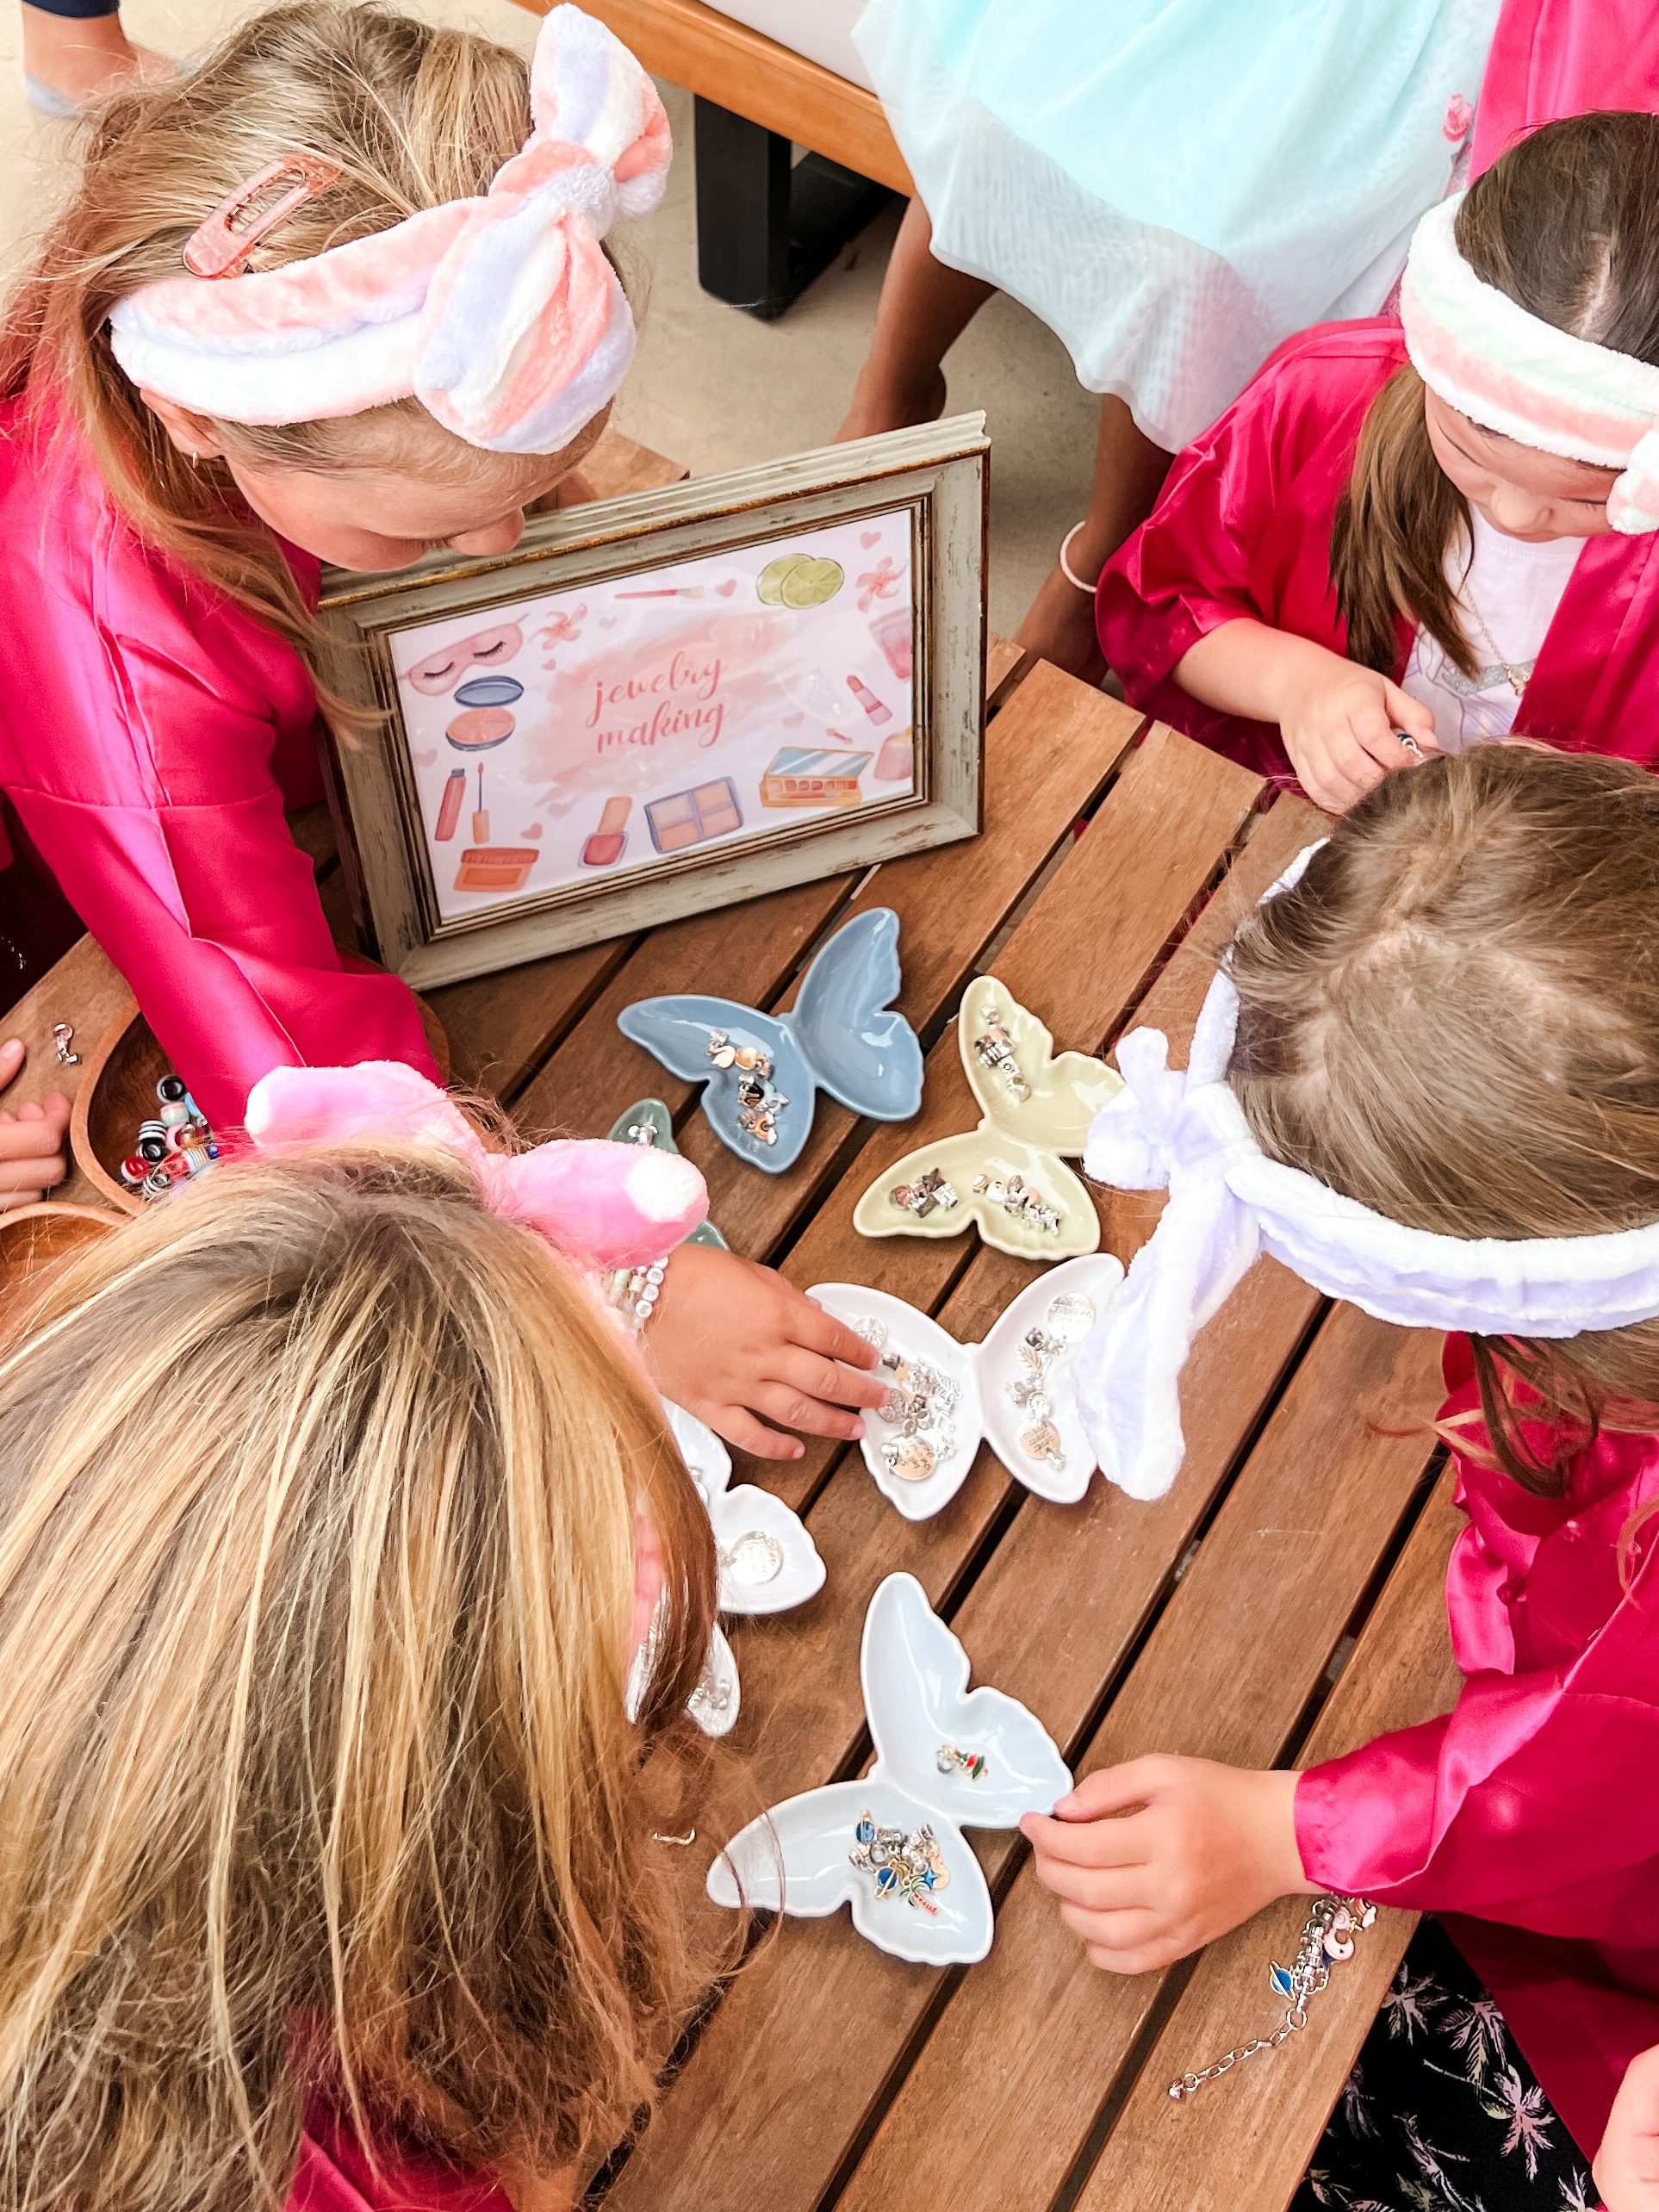
The other stations were just beyond that, and included jewelry making, the mani-pedi station, and a face painting station.


As soon as all the girls arrived, we kicked off the party with the facials. Each girl sat down and I introduced what a face mask was and what it was for. I gave them a couple of options for masks. Since they were all young and I was worried some might have sensitive skin, I stuck to hydrating masks from my favorite trusted brands. Of course, they needed to be fun too, as part of the experience. I offered them the choice of the Kiehl’s Avocado Hydrating Mask which would go on like a traditional mud mask or the COOLA hydrating Moon Silk Mask which went on as this gorgeous iridescent cream. All but one chose the iridescent rainbow mask of course!
The first step was to pull their hair back with the headbands. I then showed them how to apply the mask on their face and let them try it on their own. A lot of the girls ended up wanting some help. They loved the way it felt on their skin, and I suppose having someone else apply it made them feel extra pampered!


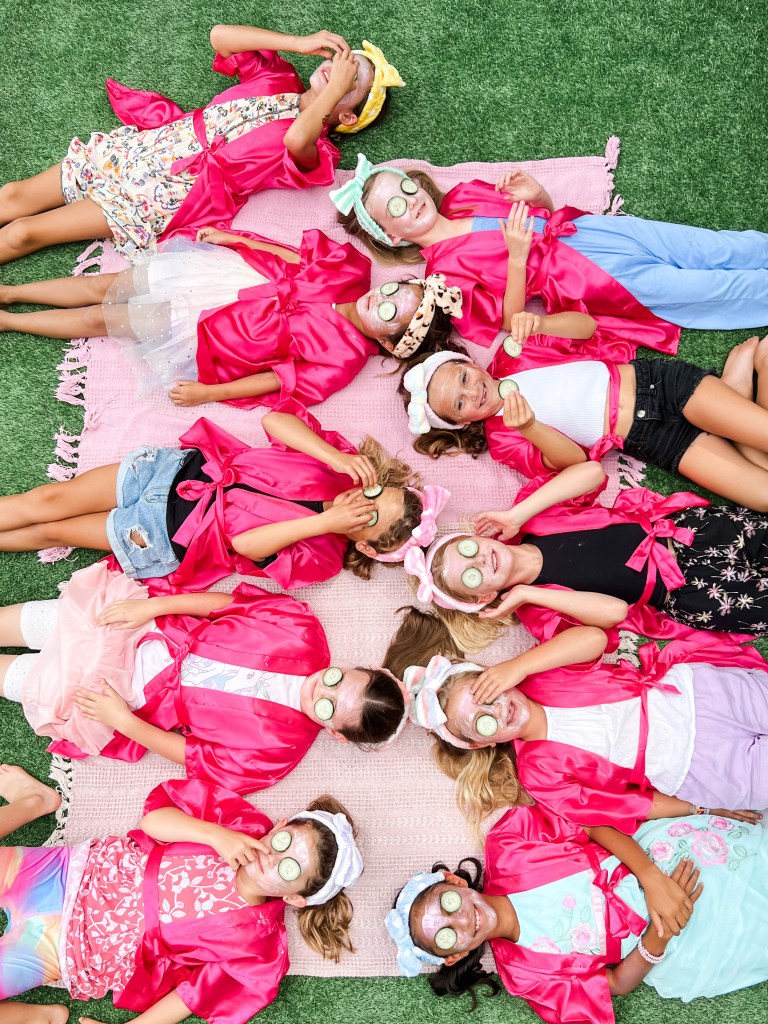
Once they all had their masks applied, it was time to let it set. I’m not sure what it is about the cucumbers but they were all extremely excited about this part. They grabbed their cucumbers and headed over to the picnic blankets, where they lay down in the shade to relax. They couldn’t wait to apply the cucumbers over their eyes. You should’ve heard the giggles as they felt the natural cooling! And of course, that made for the absolute cutest photo opp ever!
After only just a few minutes (second graders are still pretty squirmy), we headed back over to the tables. They used their individual washcloths and dipped it in bowls of water to wipe off the mask.

Next, the kids had a choice of the three different stations. My girl started off with the mani-pedi station. I bought this set of nail polishes that offered an assortment of fun colors for the girls to choose from. My babysitter helped with this station! (pro tip: hire some local students or sitters to help with the party!)

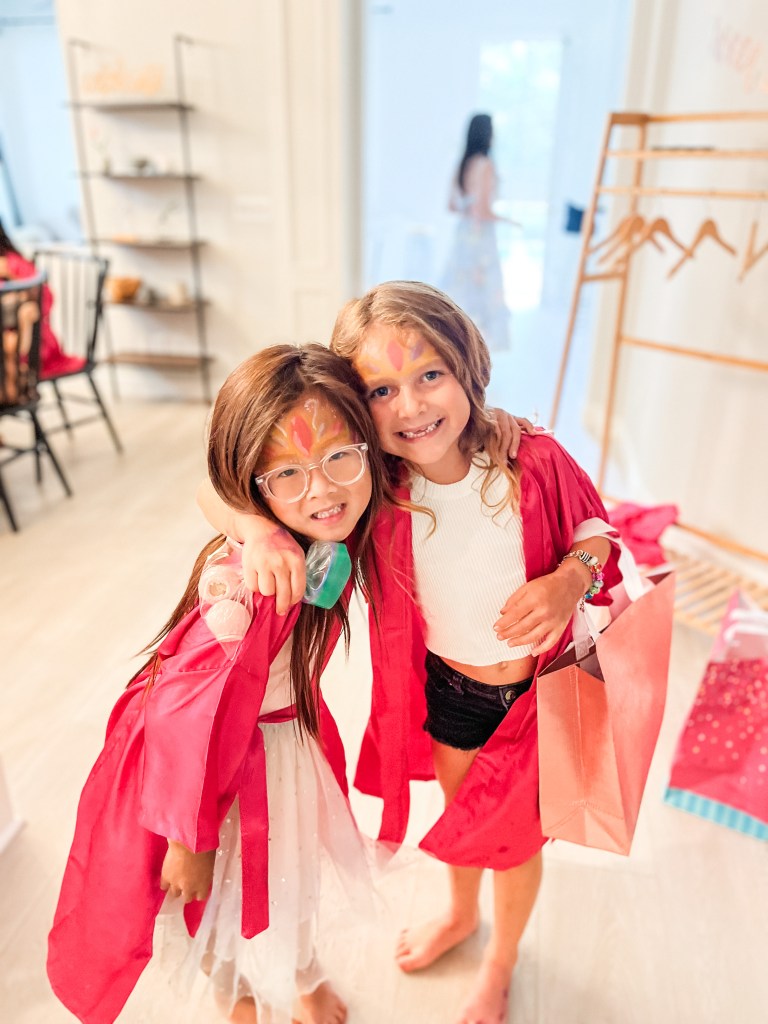
To somewhat save on costs, I manned the facepainting station myself. I had spoken with a vendor at a prior party who had recommended this set of face paint, so I just bought it and did it on my own.
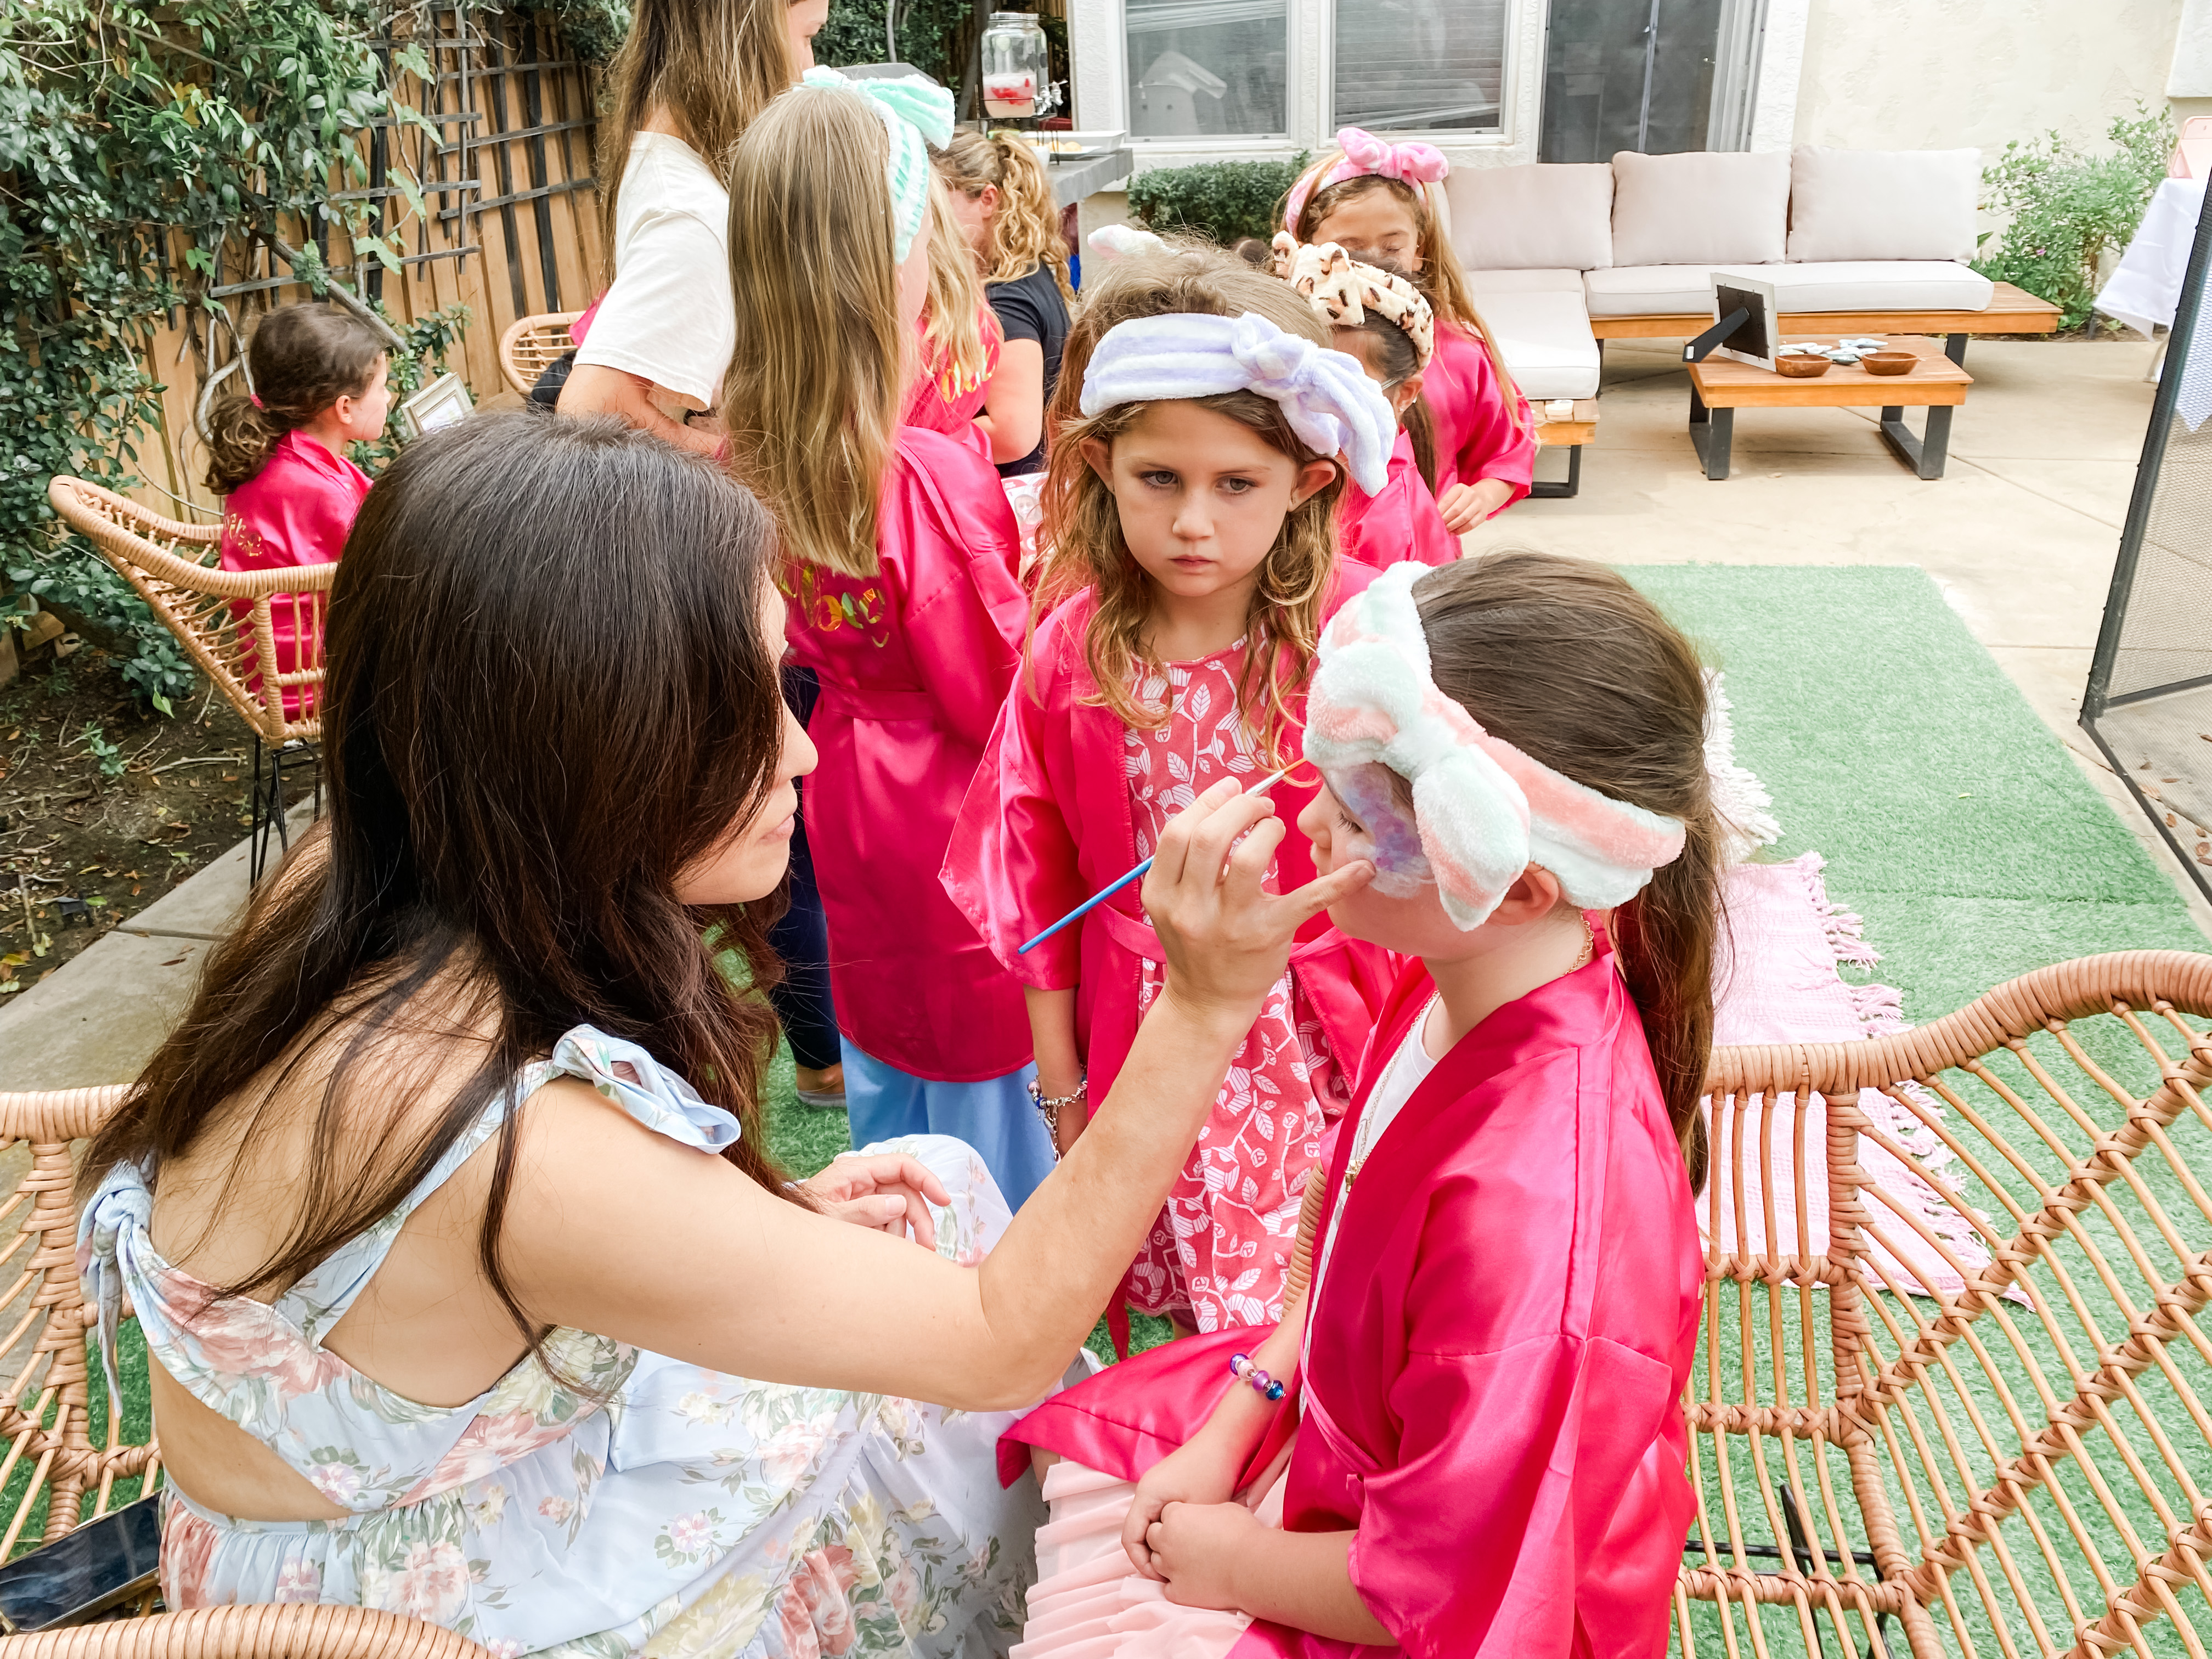

My hubby captured these photos of me facepainting the kids. I have to say I kind of love the second one,
as it perfectly captures my multitasking mama life in this season! 🙂
While the other kids were waiting, they had the option to hang out at the jewelry making station. My daughter is absolutely obsessed with jewelry – she goes through all of mine, like saving up her allowance to shop at Claire’s, and makes so much of her own that she probably has more jewelry than I do at this point. Since I needed this station to be a little more independent, I opted for this bead set instead of more traditional string and beads, so that I wouldn’t have to help cut/measure/knot the strong.
After all the activities, it was cake time of course. The nice thing about a pretty table is how excited the kids are to sit down at it. 🙂


At the conclusion of the party, the girls got to leave with their goody bags. I have to admit that I love putting thought into the goody bags because it’s kind of like a memory of the party that the kids get to take back with them. Even before I had kids, putting thought into guest favors is something I always enjoyed doing; I want guests to feel appreciated and loved because they’ve taken the time out of their busy schedules to just “show up,” which is significant. And now that it’s for my kid, I appreciate them even more because of how they make her feel loved!
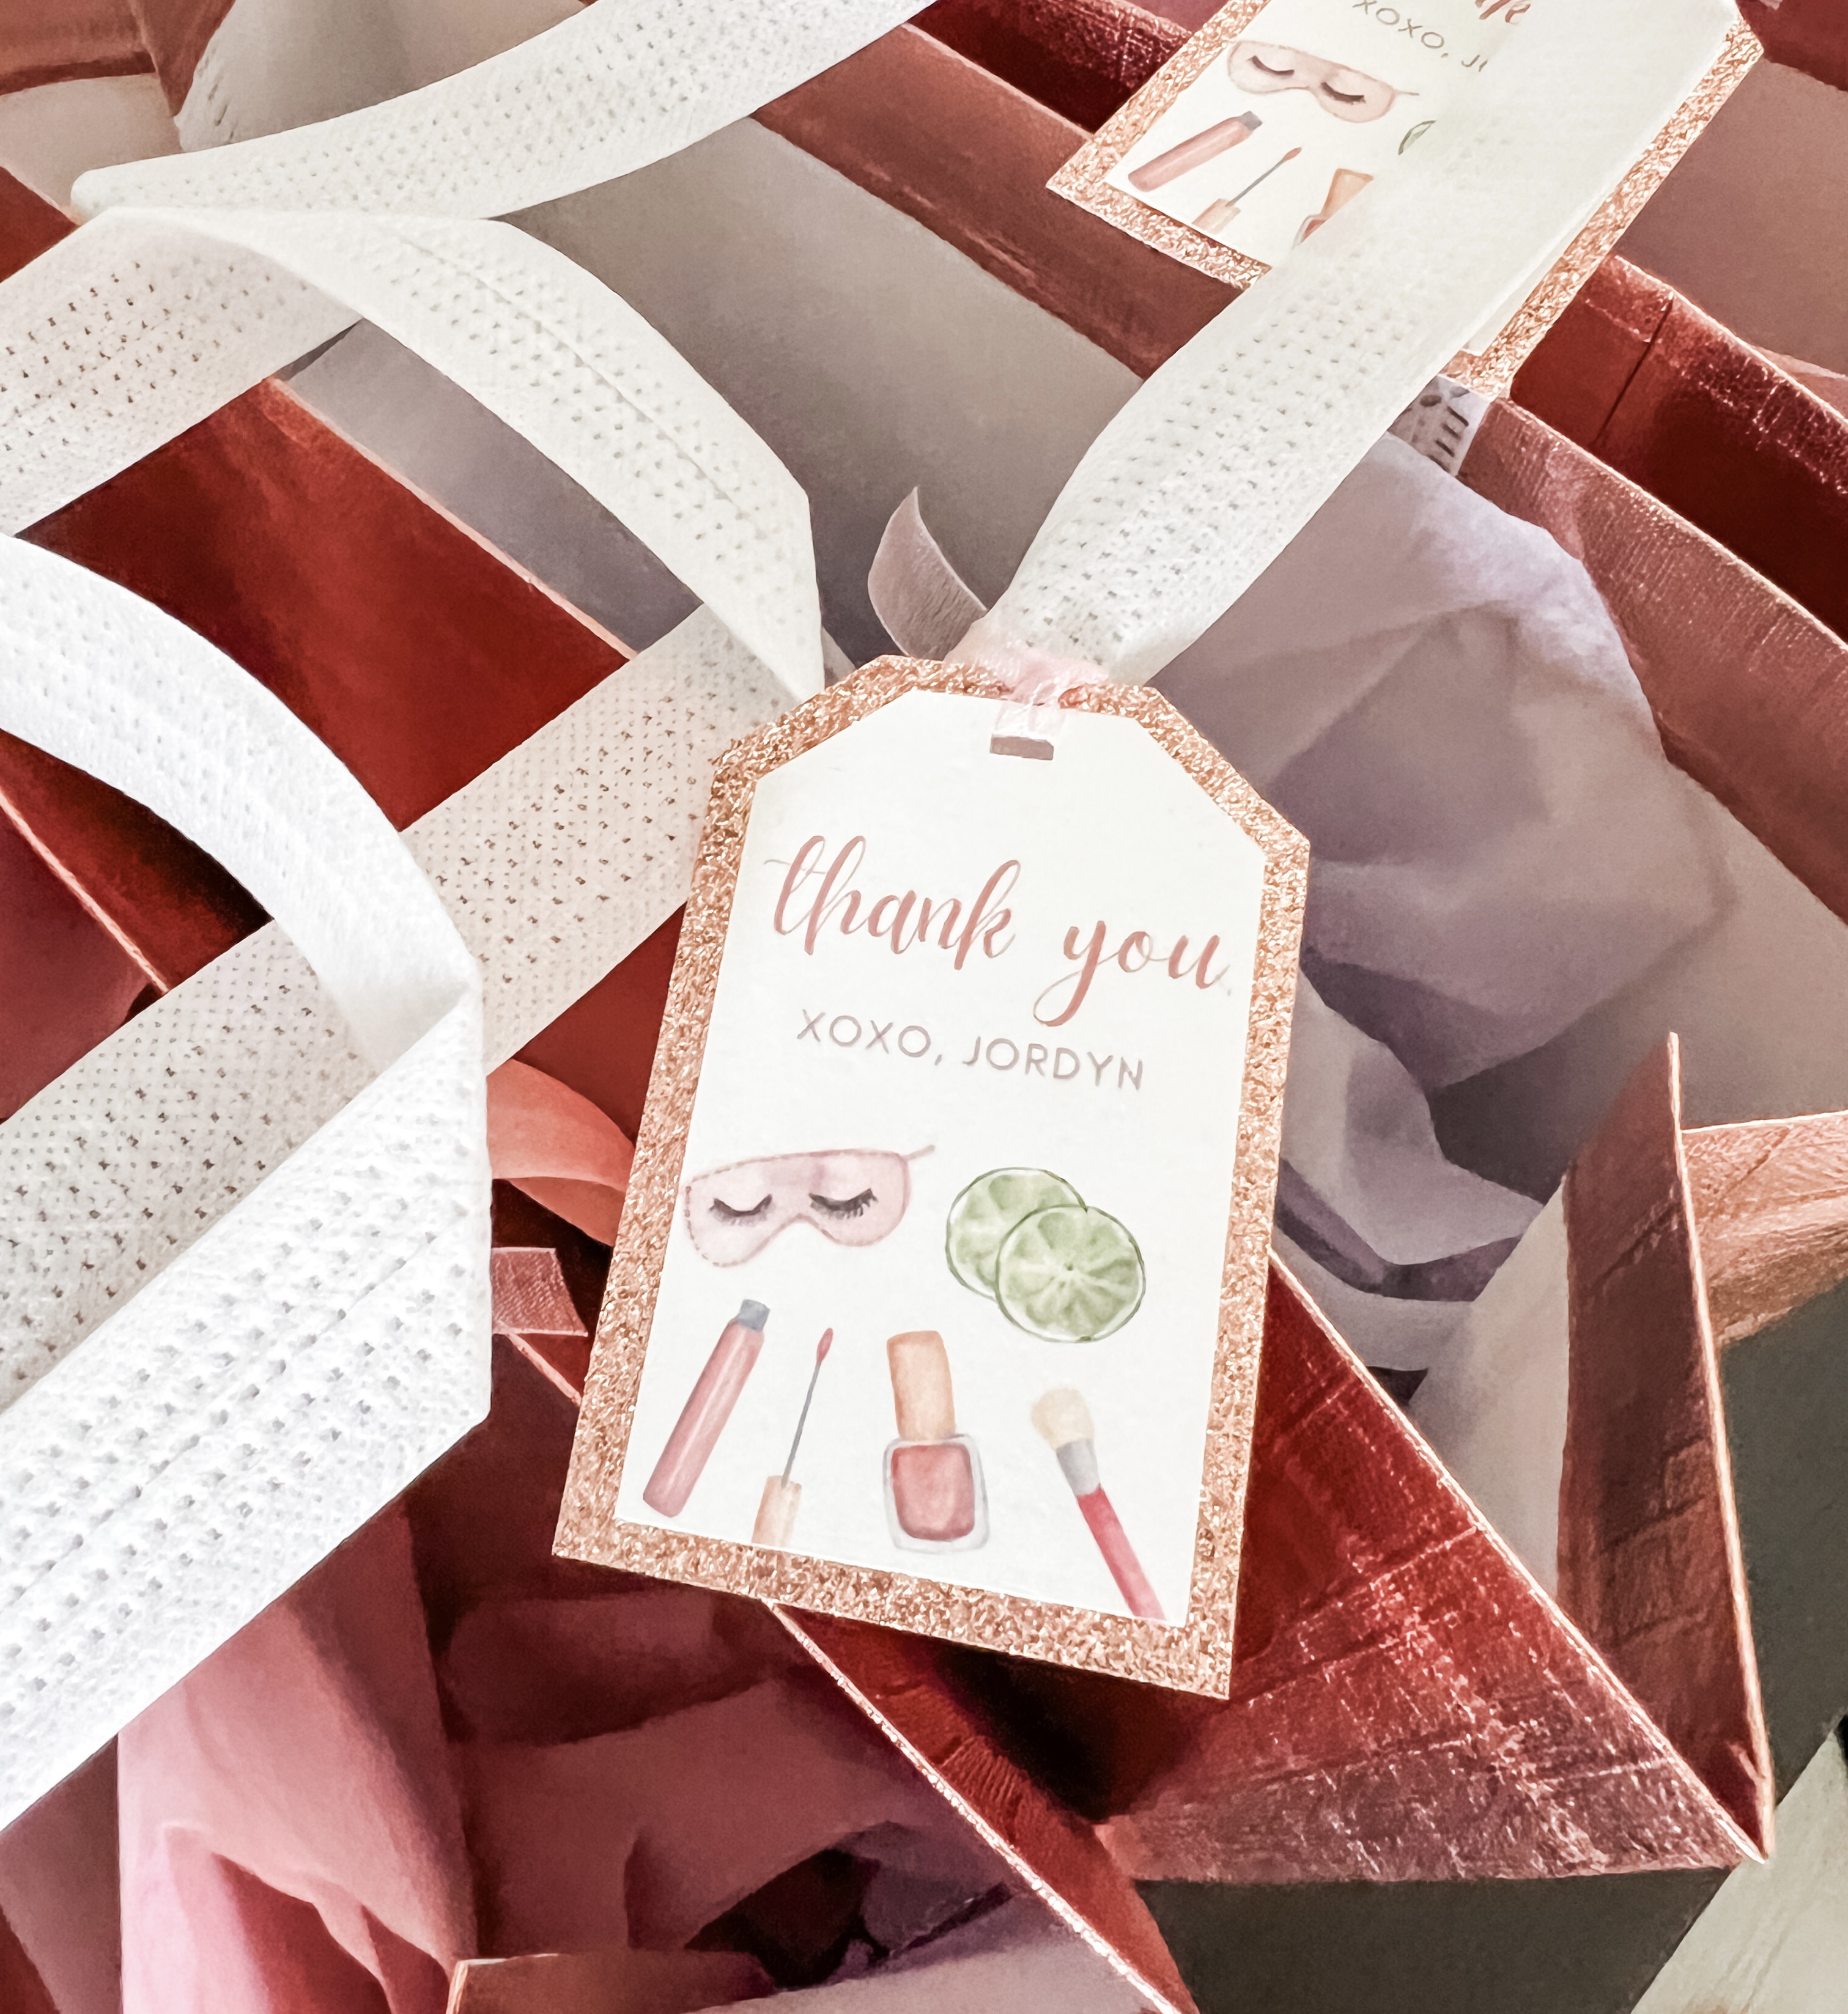
Anyway, so for the favors, I wanted to get some larger bags since they’d be taking home their robes and some of the spa stuff (I did not want to keep it all since God knows I have too much clutter as it is!). I found these shiny rose gold reusable bags that fit the color scheme perfectly. I made little favor tags that matched the invitation and other signage I had made, to keep with the theme.

Inside the bags, I included the slippers and eye covers that had come in the same package as the robes, some glossy kids lip balm, a bath bomb, and a handheld vanity mirror.
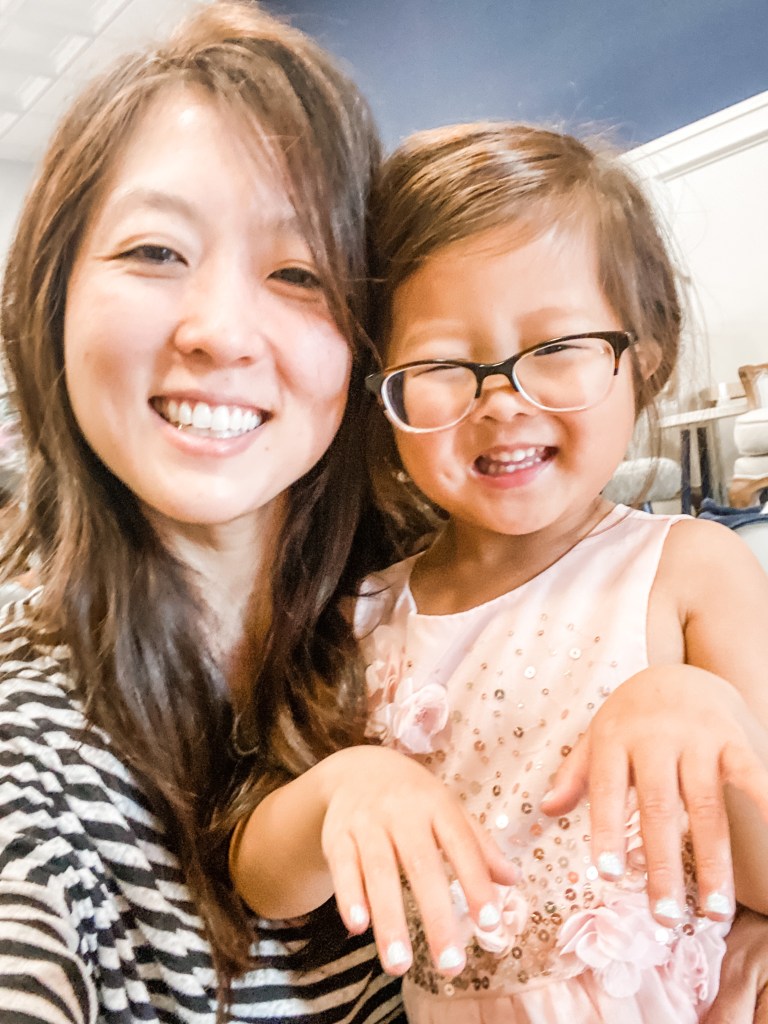
After her guests left, we spent the evening cleaning up and having a simple dinner with some of our neighbors who were kind enough to hang out and clean up with us. But when all was said and done, my favorite moment of the day was this one.
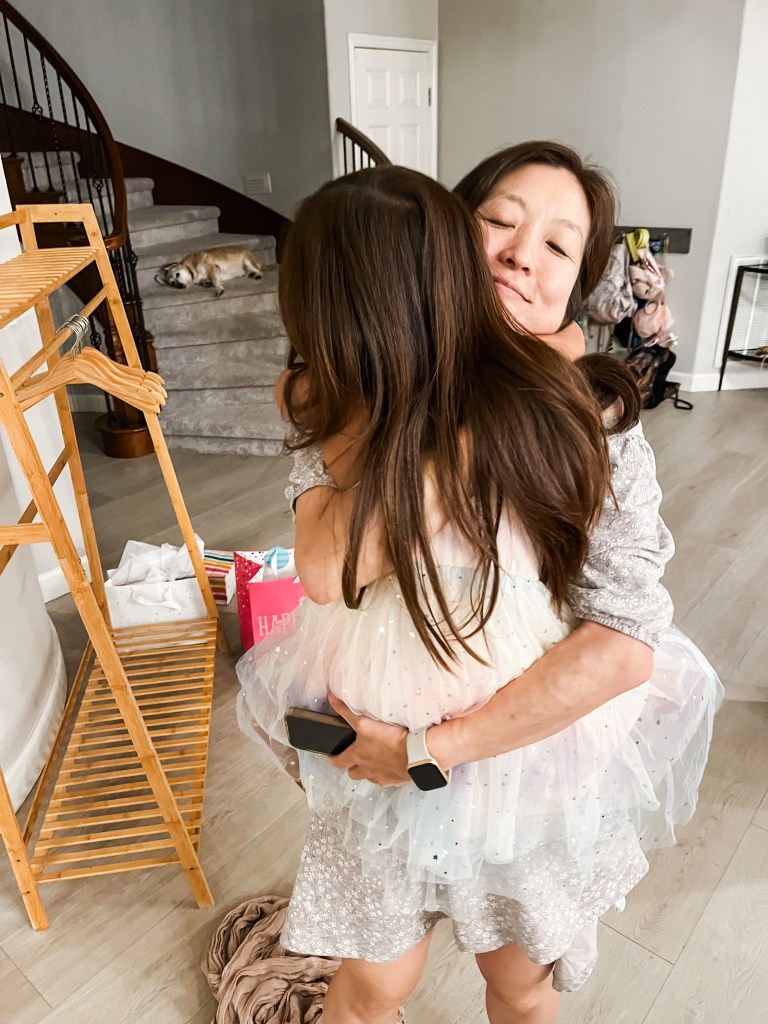
Happy birthday my dear sweet sunshine. Your mama loves you so much!
